WE ENDED LAST WEEK IN THE BLACK

We ended last week in the black – at least in the finish room. Black has been a popular finish choice for the last couple of years. Some say it is the new neutral. They are probably right, everything goes with black.

This week we finished a couple of projects in black.

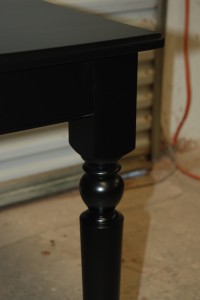
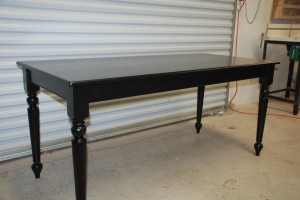
The first is a table that was commissioned to go in a hunting lodge as a base for a trophy mount. The design is fairly simple and the satin sheen black makes it a great choice for showcasing the mounted animal. The same idea would work great for showcasing any type of art. Constructed entirely from maple it features nicely turned legs and a small bead detail on the aprons. While we are proud of the piece, in this case it will disappear under the piece on display. In the photos below, the one on the right shows the leg and apron detail.


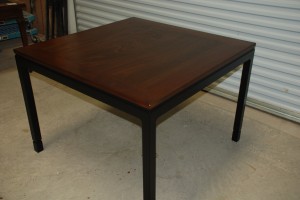
Our friends Carolyn and Jerry brought us a nice square table which they moved from their home in New Mexico. Originally made by another Texas furniture maker, it was used as a corner table with two twin beds in their mountain home. It has now been re-purposed as a small dining table for their granddaughter’s college apartment. The table is made of mahogany with a framed top and a small cove detail between the top and the aprons. At about 40″ square, it is perfect for an apartment dining area.

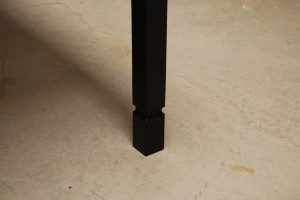
Our instructions were to “make the table taller”. We had to add a little over 3″ to make it dining table height. We have made a lot of tables taller, and the goal is always to make it look like nothing was done. This table was glued together very well when it was made, leaving us no options for dis-assembly. Our solution was to add to the bottom of the legs. After cutting blocks to size, we turned a tenon on the end of each. The legs were drilled and the new extensions glued on. At the joint line, we repeated the cove detail from above.

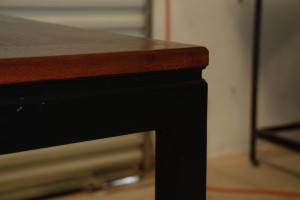
To disguise the joint, and eliminate the need to refinish, we lacquered the table base black. The black ends just under the tabletop in the cove detail. The mahogany finished top appears to float over the shadow line. You can see the cove detail under the top in the photo on the left. On the right is the detail of the leg.


Below you can see the whole table. After traveling from Texas to New Mexico and back to Texas, it is now headed to Oklahoma for a higher education.

Posted in Commissioned Pieces | Tagged , , | Comments Off on WE ENDED LAST WEEK IN THE BLACK

BOYS WILL BE BOYS

Take one antique, heirloom bed, mix with two brothers, and what do you get? In this case a broken bed post.

This is a fairly common furniture repair around our shop. Most of the time we hear “I am not real sure how it happened”. This time the brothers confessed and both felt bad for accidentally damaging what had been their grandparent’s bed. These are obviously good kids. At our house all of our kids would have blamed the other ones, or all the boys would have blamed their sister.

After we brought the bed to the shop, one of the brothers started asking his mother just how we were going to fix it. He wanted details too. So this post is for you Burke.

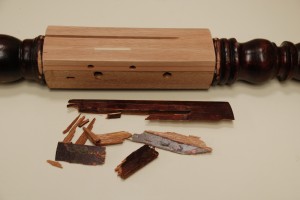
The footboard we worked on is part of a pair of nice mahogany twin beds from the early to mid 20th century. Most beds of this era are assembled with hooks in the bed rails and pins in the bed posts. When leverage is applied to either piece the post is damaged where the pins are inserted. That is simple physics. The first photo shows the results as we begin to disassemble the footboard.

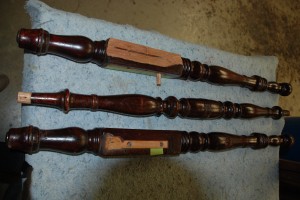
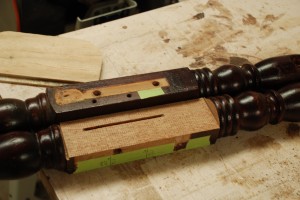
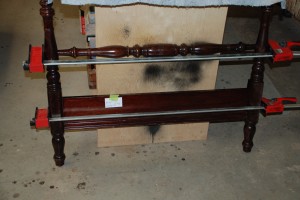
Before we can repair the damage we need to disassemble the footboard so we can work on just the post. Here you see the two bed posts along with the turned cross rail.

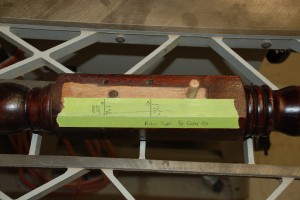
Now that we can work on the damaged post, we measure and mark for the pin holes and the rail slot. If we cut the damage away first, we can lose the ability to locate the pins or possibly cut the slot in the wrong place.


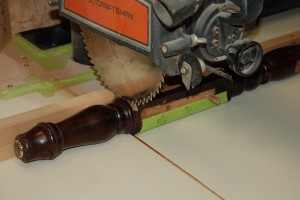
We cut away the damaged wood with a dado cut on the radial arm saw. Here you can see the saw set up with the blade raised to only cut away the damaged wood. It takes many passes to cut out all the damage using the regular blade. A dado blade can be used to make wider cuts per pass, but it would take longer to change the blade than doing it this way.

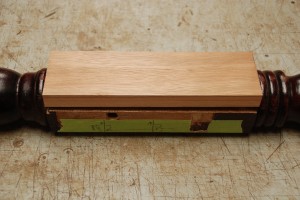
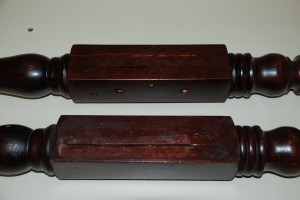
Now that all the damaged wood is removed, we cut a new piece to size to insert into the post. We are using genuine mahogany which is what the bed is made from. Below you can see the post with the damage removed, sitting next to the undamaged post, and the new piece of mahogany cut to size.


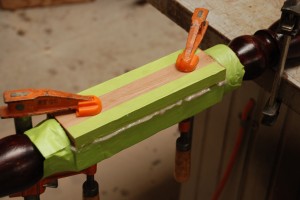
The new piece of mahogany is glued and clamped in place using an epoxy adhesive. The epoxy was originally formulated for wooden boat building. It will penetrate into the wood and fill all the gaps in the joint, then sit in clamps overnight. Once cured, the adhesive is stronger than the wood.

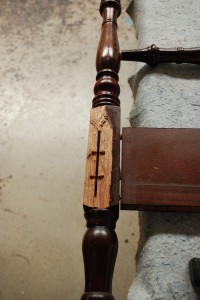
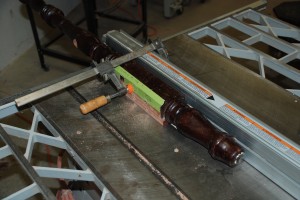
When the clamps are removed, the new wood is shaped to match the surrounding areas, the edge is cleaned up and the repaired area is sanded smooth. The new pin holes are drilled according to the marks we made on the green tape. Then we clamp the post onto the table saw to cut the slot for the rail hooks. This is done by raising the blade into the wood while it is clamped to the table saw.

That completes the woodworking part of the repair. Here beside the repaired post, you can see the original splintered pieces of wood. The next shot is the repaired post after the finish has been touched up to match the bed.


The footboard is glued and assembled. It will remain in clamps overnight to cure.

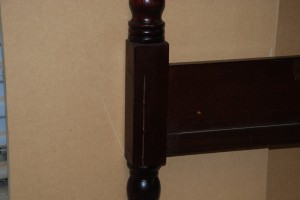
Here is a closer picture of the repaired post after final assembly. Good as new!

If you have stayed with me this far, thanks for reading.


Posted in Furniture Restoration | Tagged , , | Comments Off on BOYS WILL BE BOYS